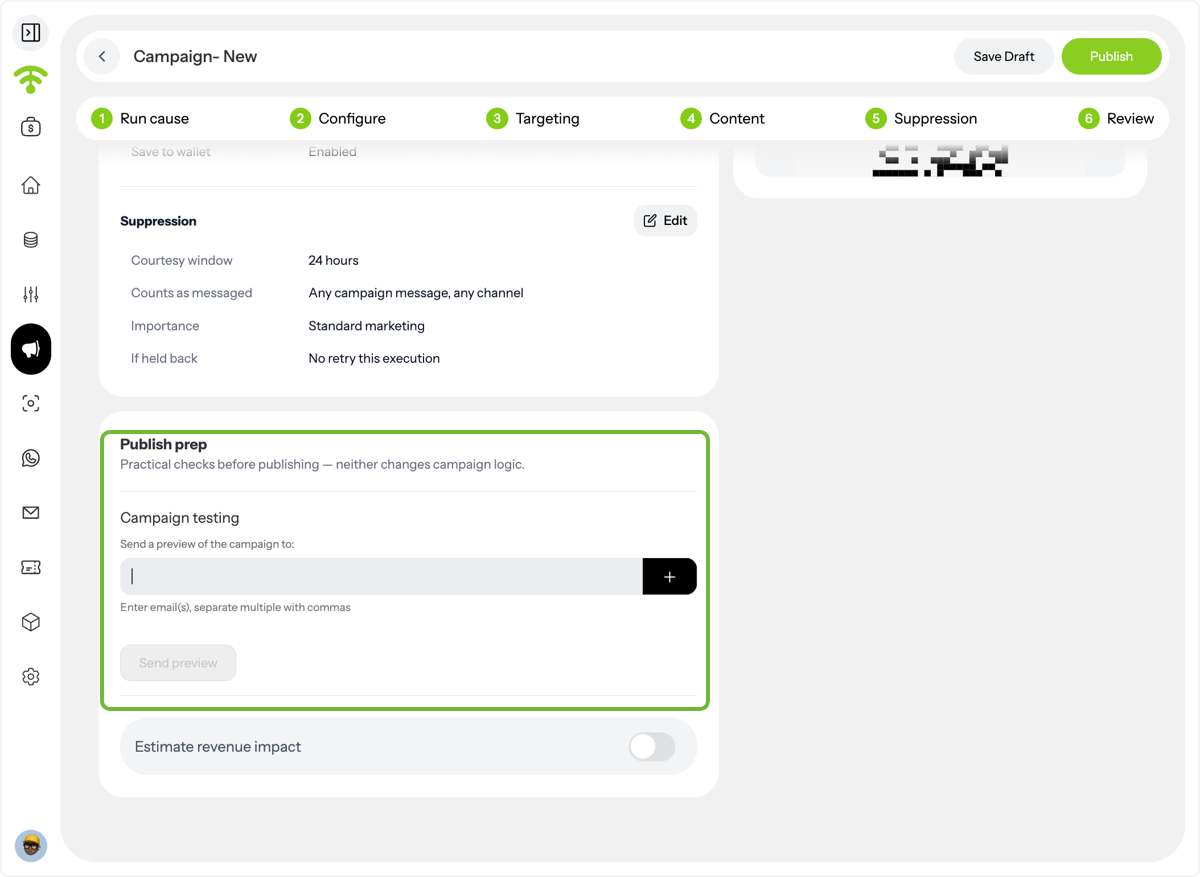
Create automated campaigns triggered by a guest’s QR code submission. This guide walks you through setting up a QR-based customer activity campaign, defining your target audience, creating your message, configuring suppression rules, and testing your campaign before publishing.
Affinect
Open Campaigns
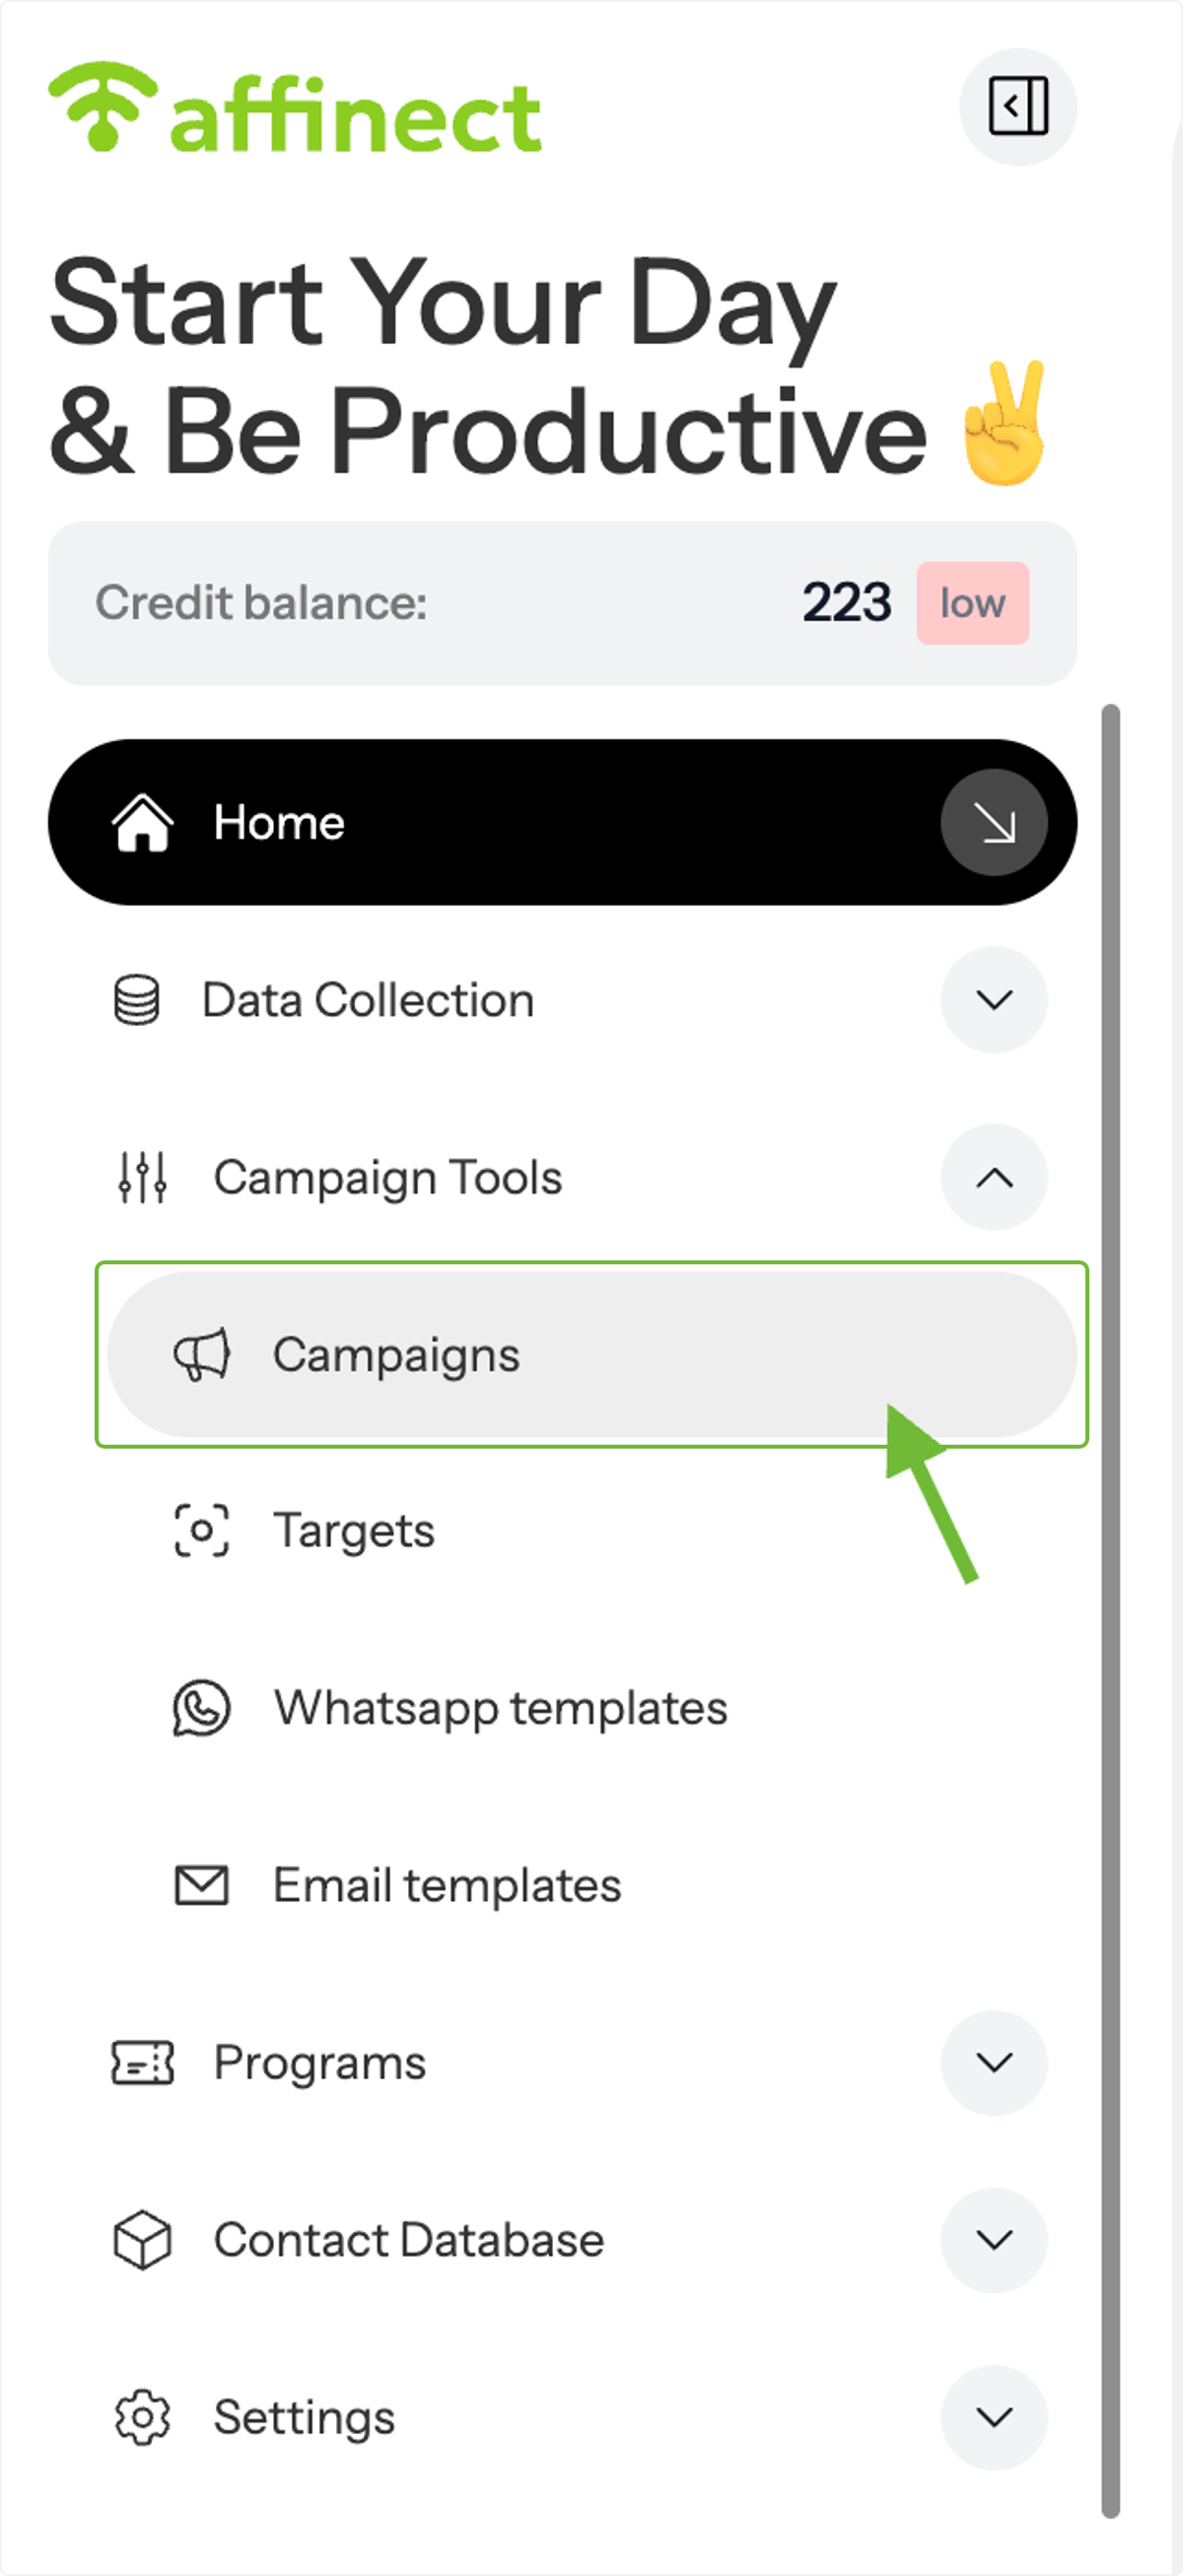
From the left-hand menu, go to Campaign Tools → Campaigns.
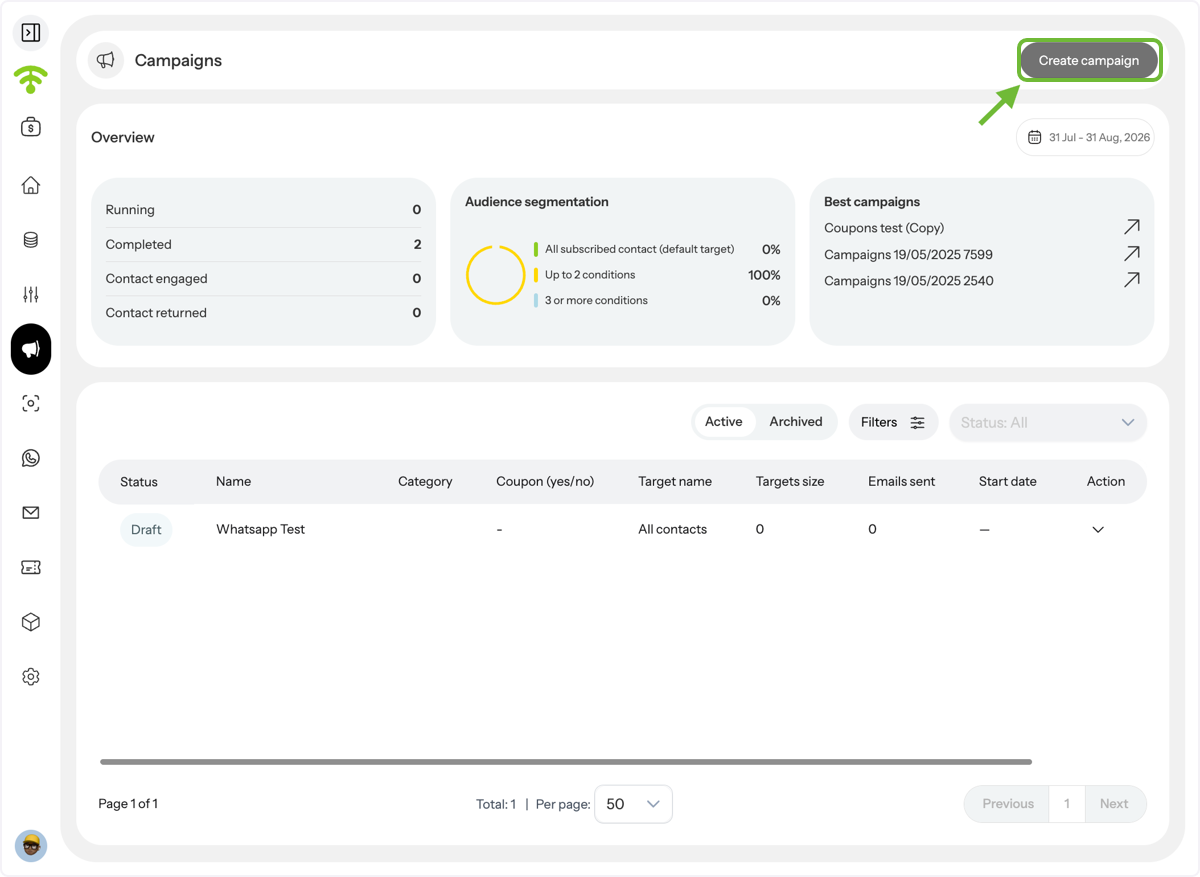
Create a Campaign
The Campaigns page displays your existing campaigns and their status. To create a new campaign, click Create Campaign in the top-right corner.
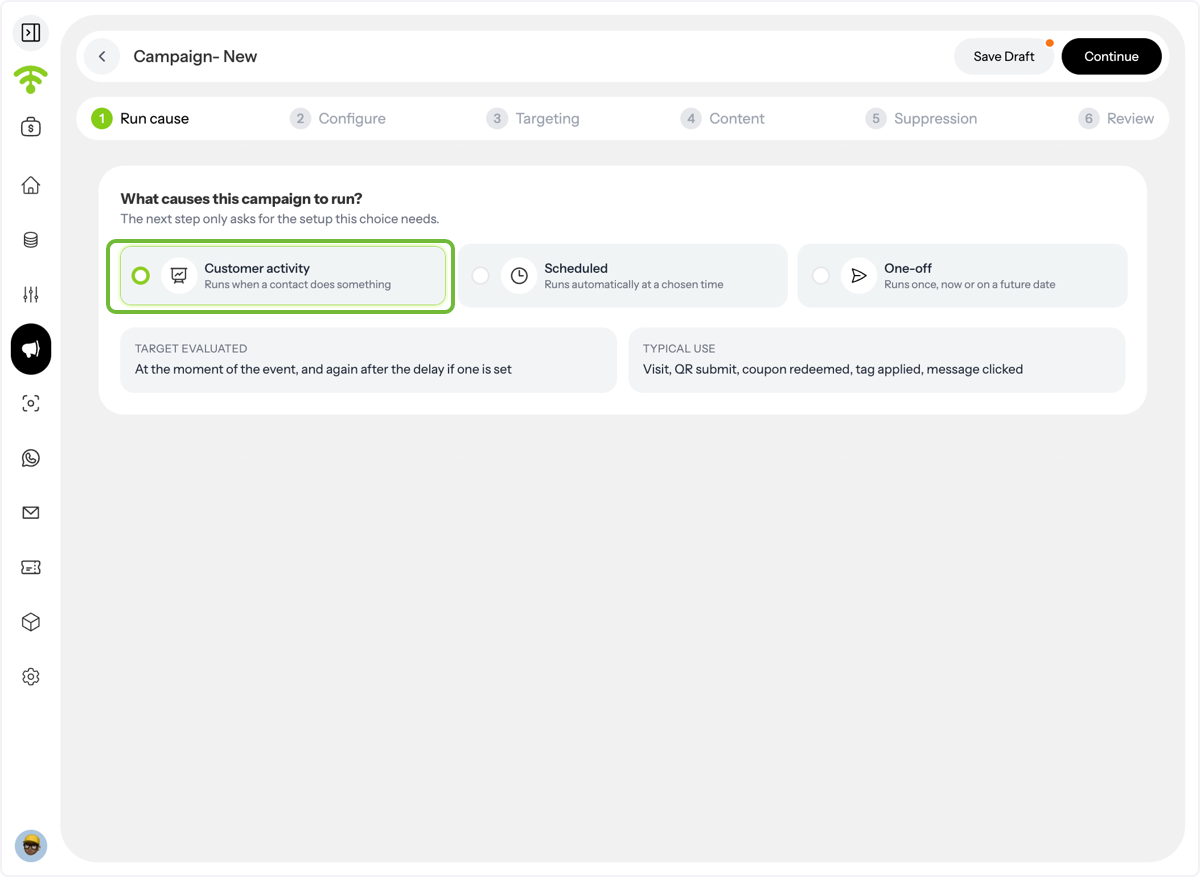
Choose How Your Campaign Runs
Select the type of campaign you want to create based on when you want your message to be sent:
- Customer Activity – Automatically send a message when a specific customer activity occurs.
- Scheduled – Set your campaign to run on a specific date and time.
- One-Off – Send a campaign once to your selected audience.
Choose the option that best matches your campaign goal.
Configure Your Campaign Trigger
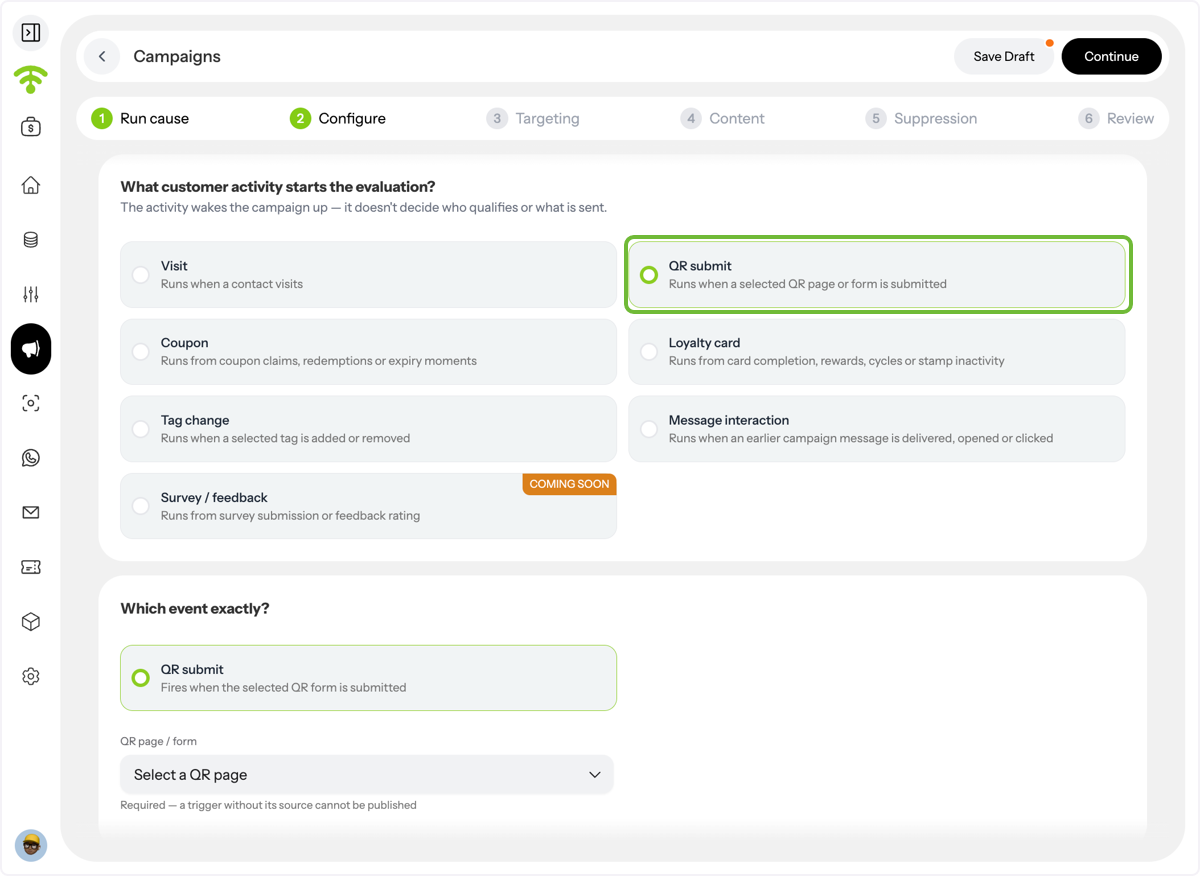
Move to Configure, select QR submit as the activity, and event to trigger your campaign. The selected activity determines when Affinect wakes up the campaign and starts the sending process.
Select Timing and Duration
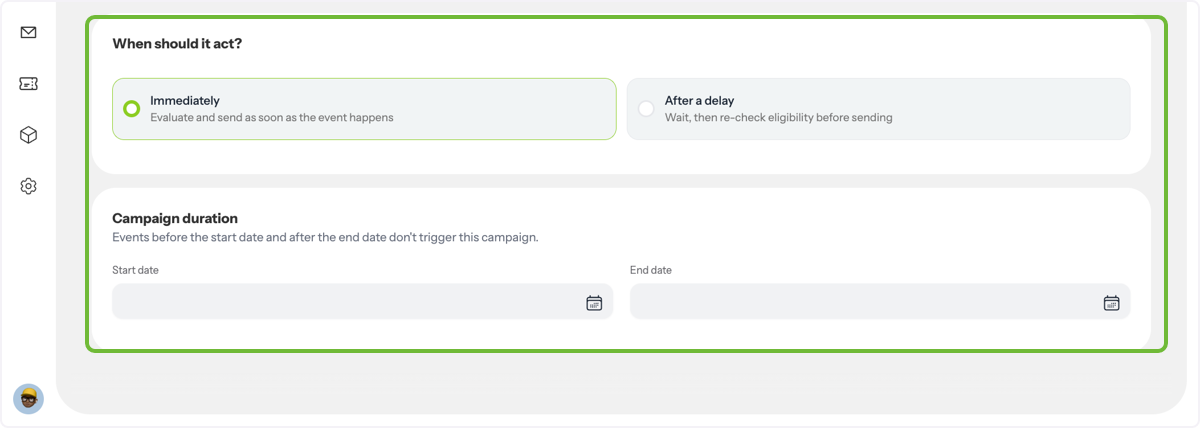
Select when you want to send the campaign and its duration.
Select Your Target Audience
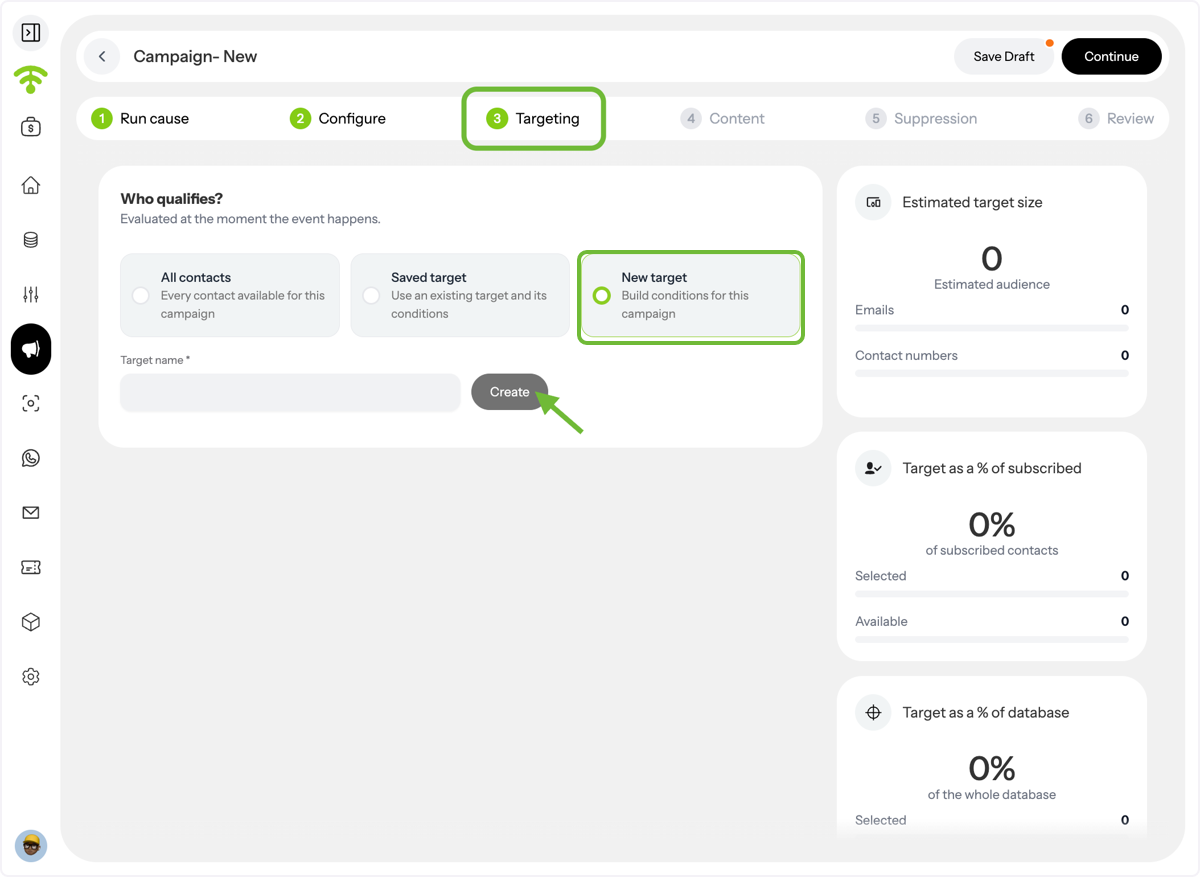
Move to Targeting and select an existing target audience. If you don't already have an audience that fits your campaign, click Create to build a new one.
Add Audience Conditions
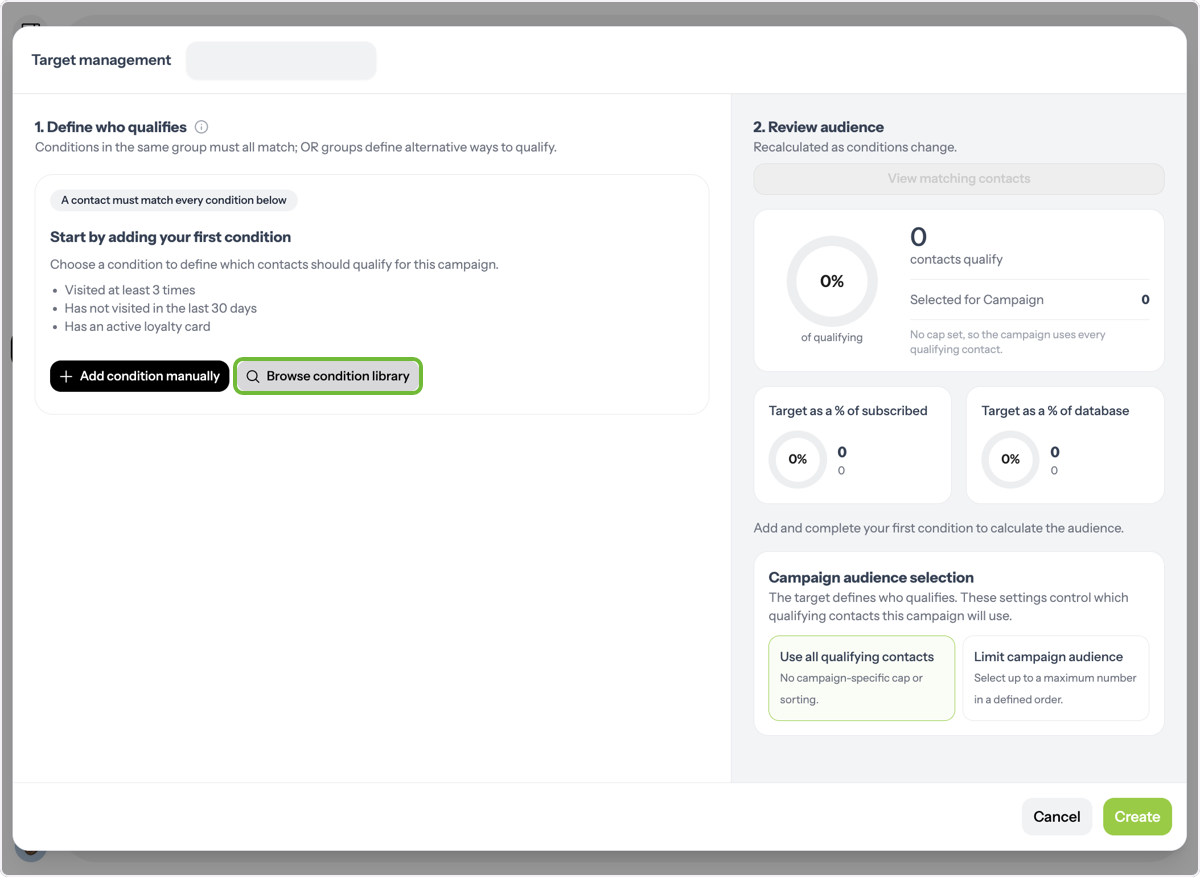
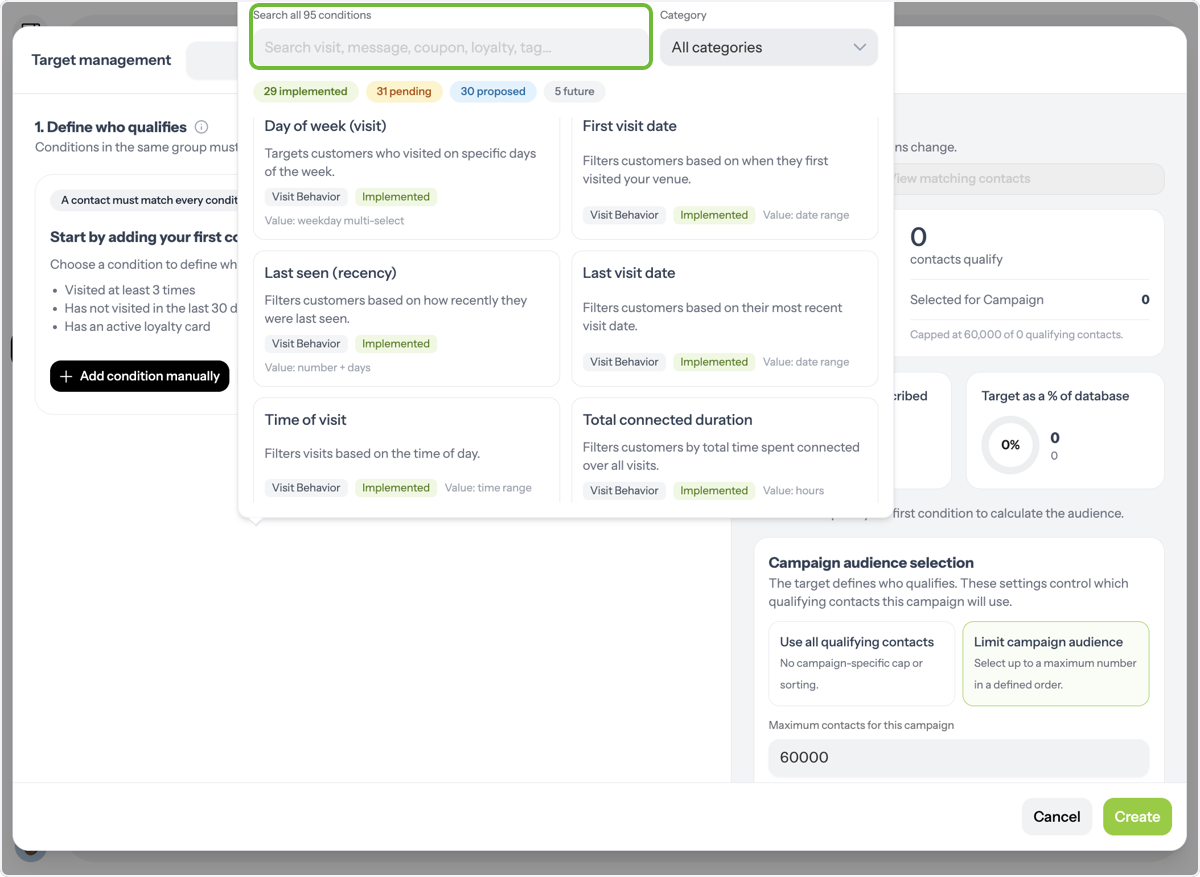
Build your audience by adding conditions manually or selecting conditions from the Conditions Library. Conditions allow you to narrow down your audience based on the customer data and activity available in Affinect.
Browse Available Conditions
Explore the Conditions Library to find the right criteria for your campaign. Affinect currently offers 95 conditions to help you create more precise audiences. You can combine conditions to make your targeting as broad or specific as needed.
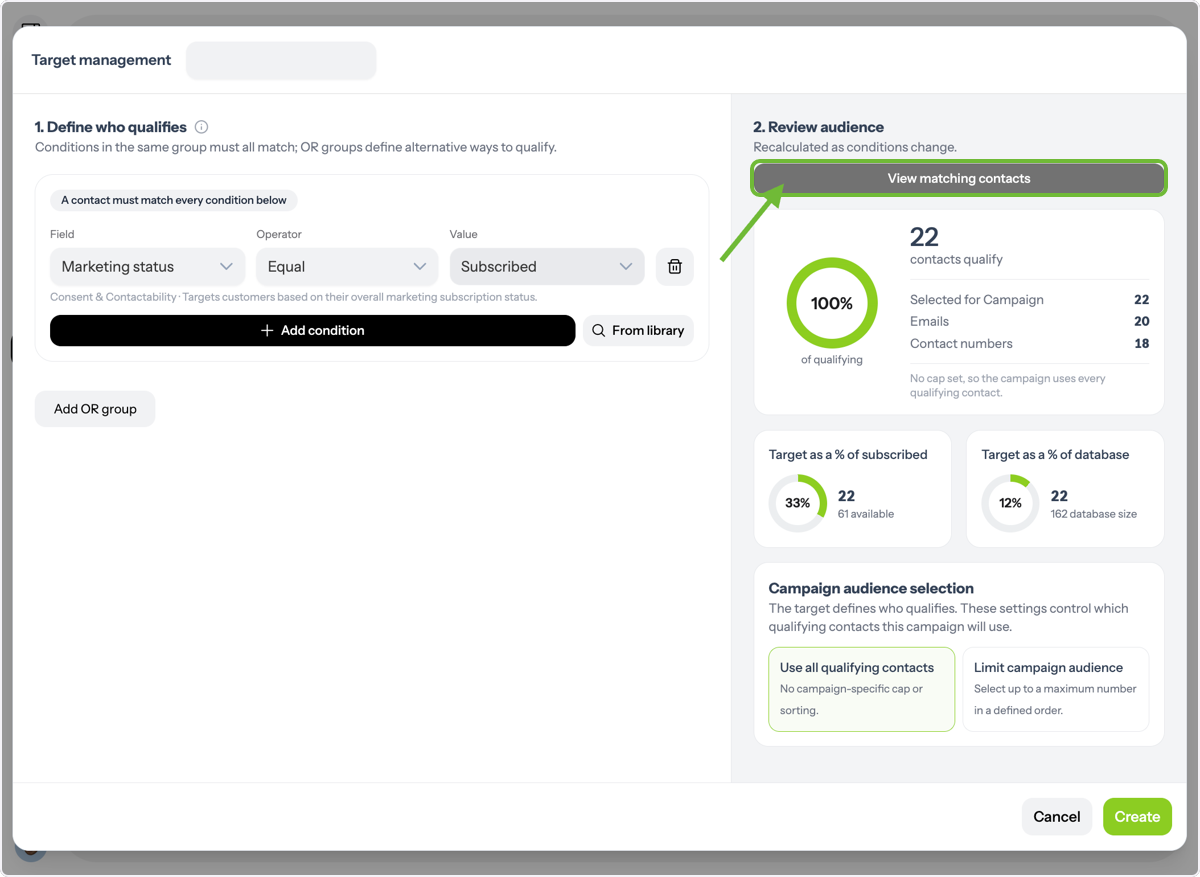
Review Matching Contacts
Before sending your campaign, check exactly who matches your targeting criteria. Click View Matching Contacts to see the contacts that qualify for your audience.
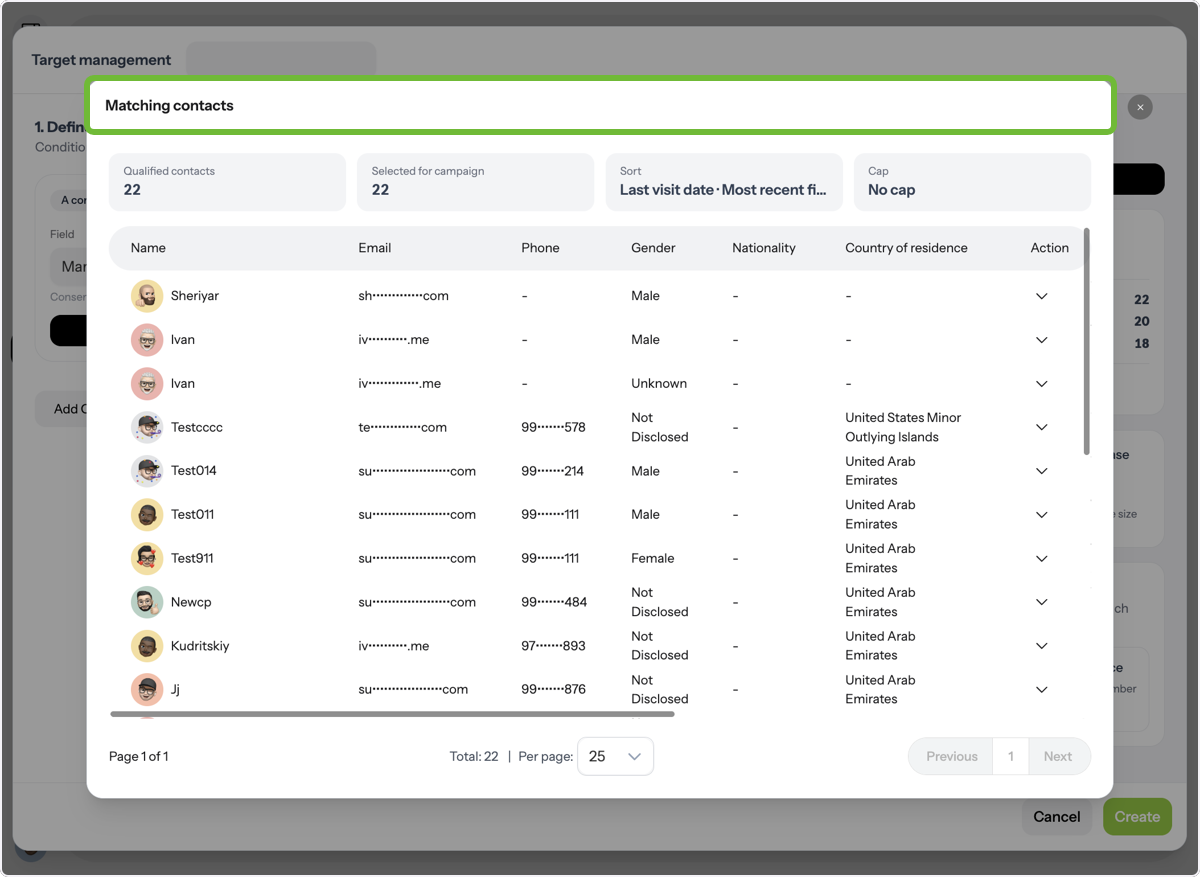
Review Your Audience
The matching contacts page shows the customers who meet your selected conditions, along with their available contact details. Use this view to make sure your targeting is reaching the audience you intended.
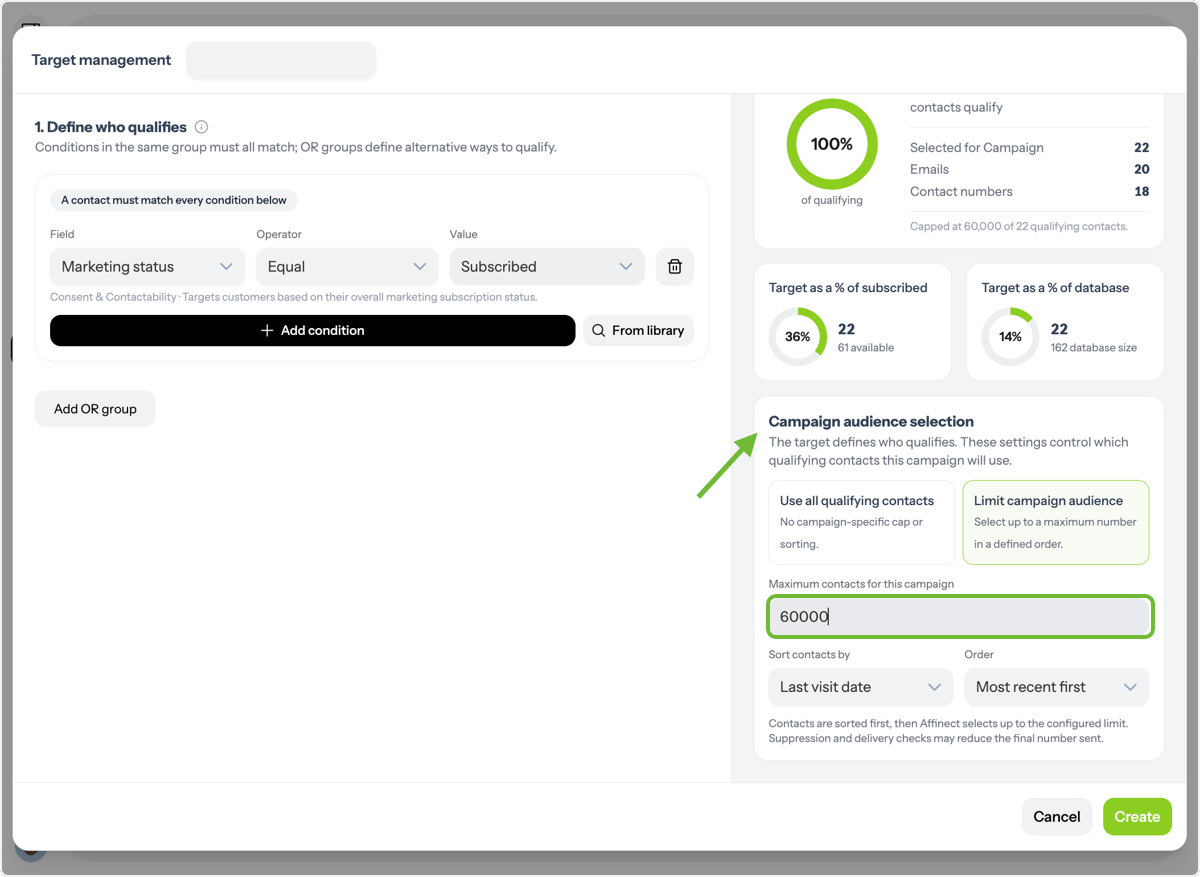
Limit and Sort Your Audience
You can limit the number of contacts who receive your campaign.
For example, if 100 contacts match your targeting criteria but you set the audience limit to 60, only the first 60 contacts in the selected order will receive the campaign.
You can choose:
- The maximum number of contacts
- How contacts should be sorted
- The sorting order
This gives you more control over which contacts are prioritised.
Choose Your Delivery Channel
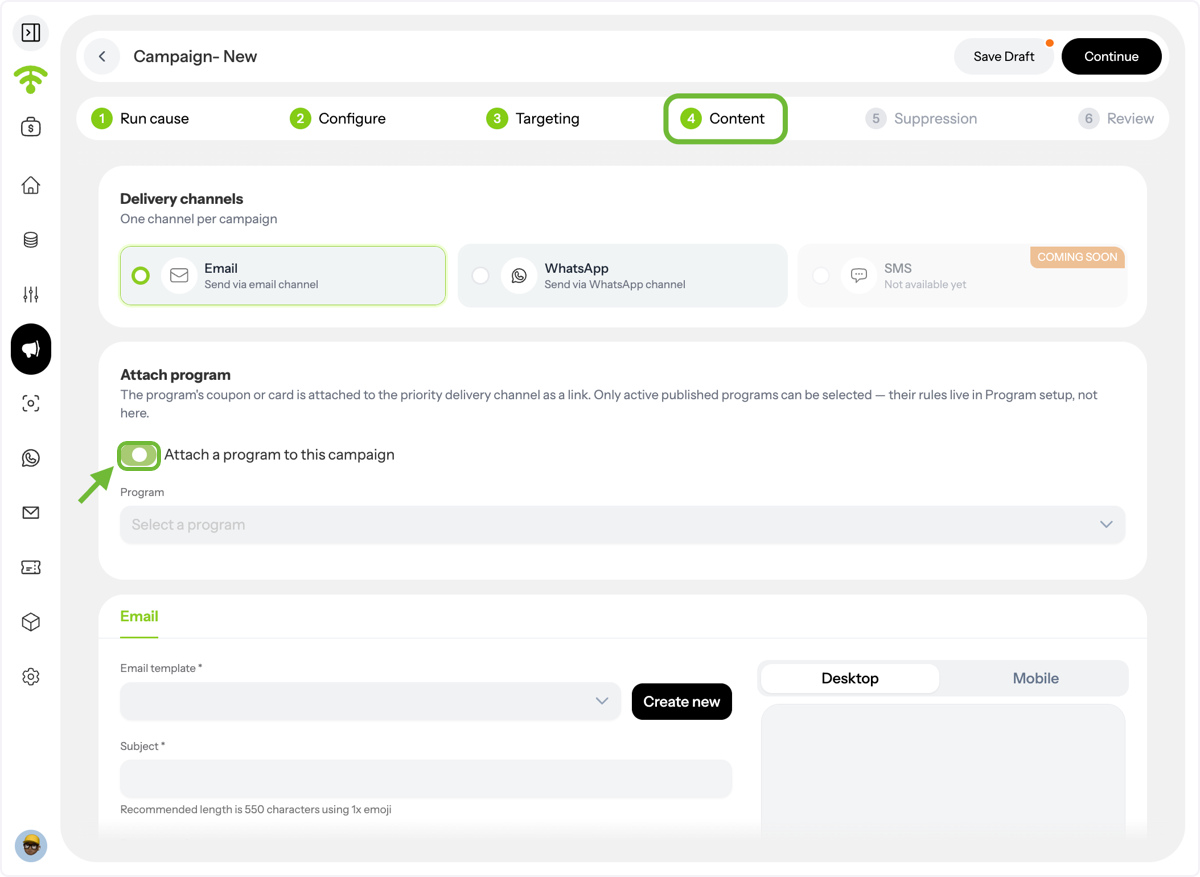
Move to Content and select the channel you want to use to deliver your campaign.
Depending on your setup, you can choose the appropriate messaging channel for your audience.
You can also attach a Loyalty Program to your campaign, provided the program is currently Live and running.
Create or Select Your Message
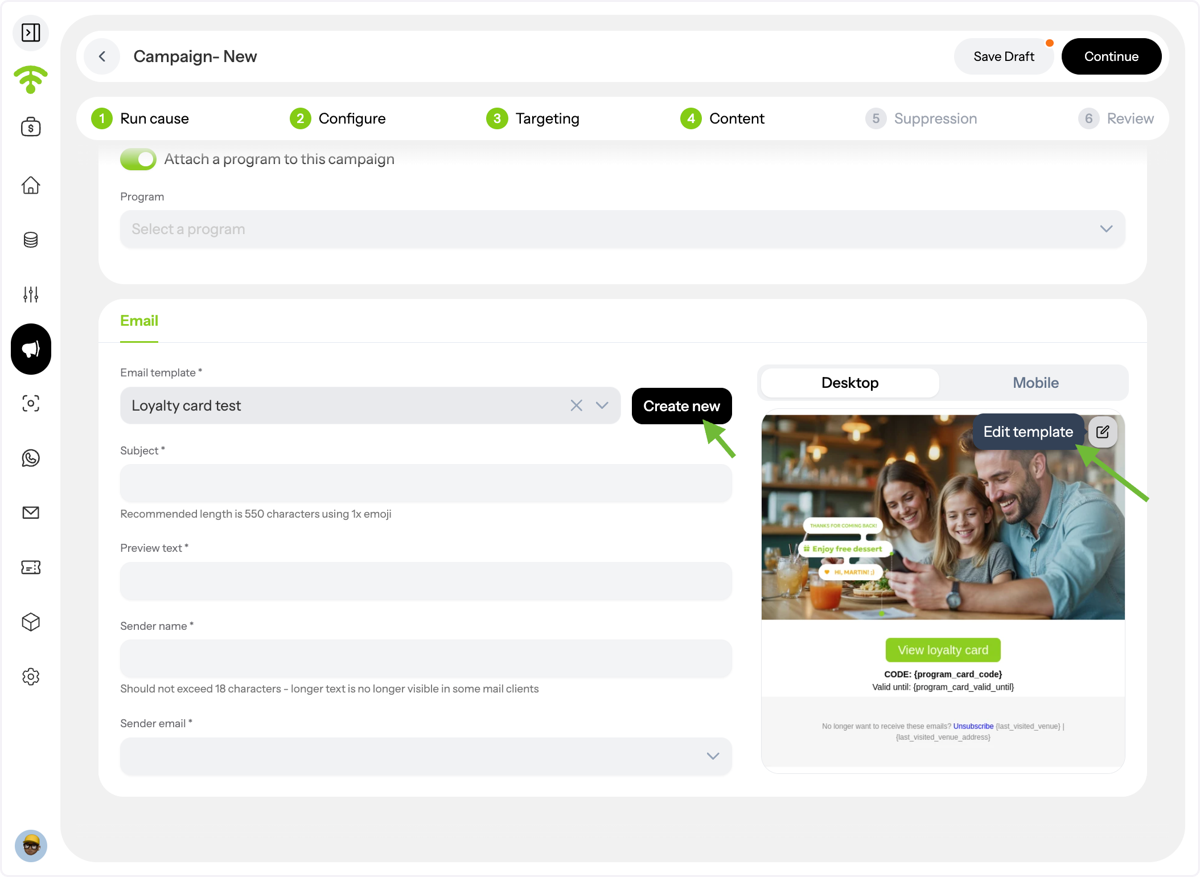
For email campaigns, you can:
- Select an existing email template
- Create a new template
- Preview your template
- Edit your template
Make sure your message and offer match the audience you've selected.
Configure Message Suppression
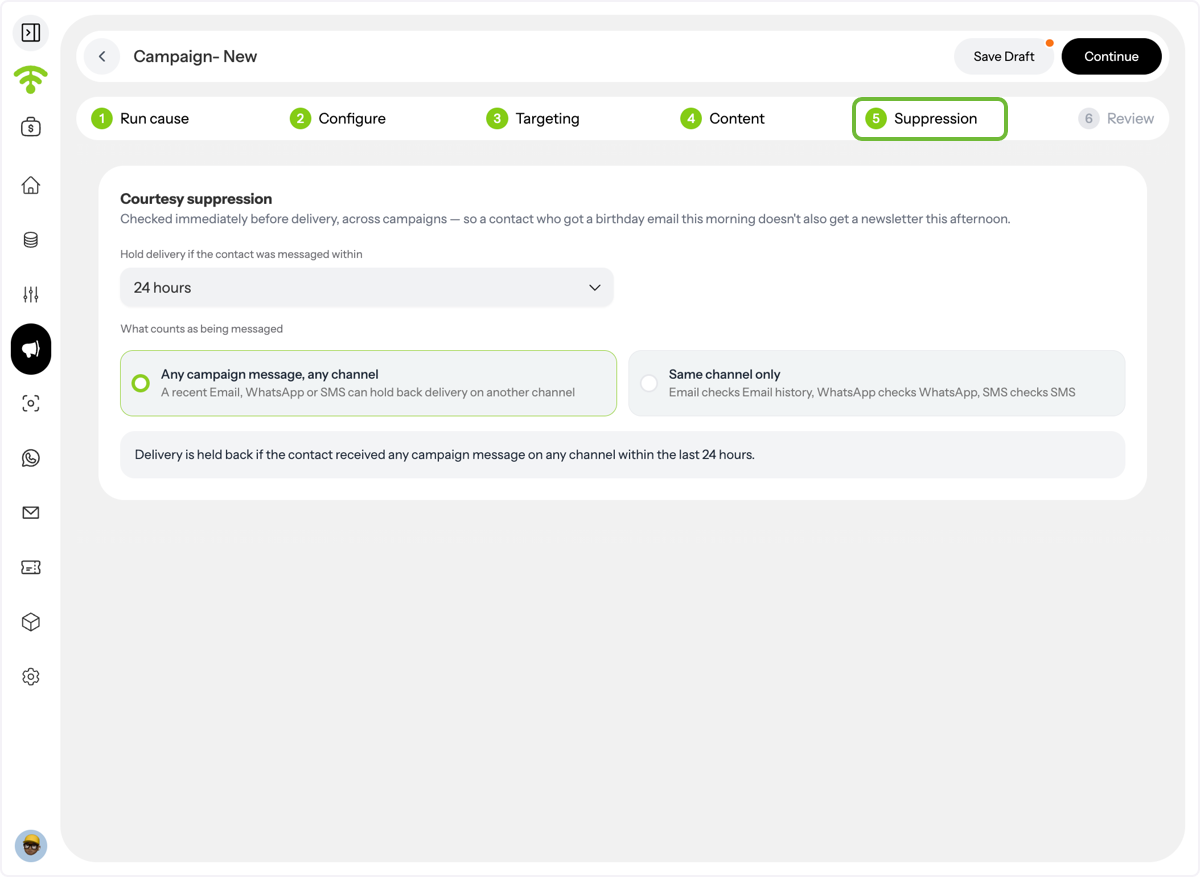
Move to Suppression to control how frequently a customer can receive your campaign.
You can set a delay if a contact has already received a message within a specified period.
For example, you can prevent a customer from receiving another campaign if they received a message within the last 24 hours. You can also select which delivery channel the suppression rule should apply to.
This helps reduce message fatigue and prevents customers from receiving too many communications in a short period.
Review Your Campaign
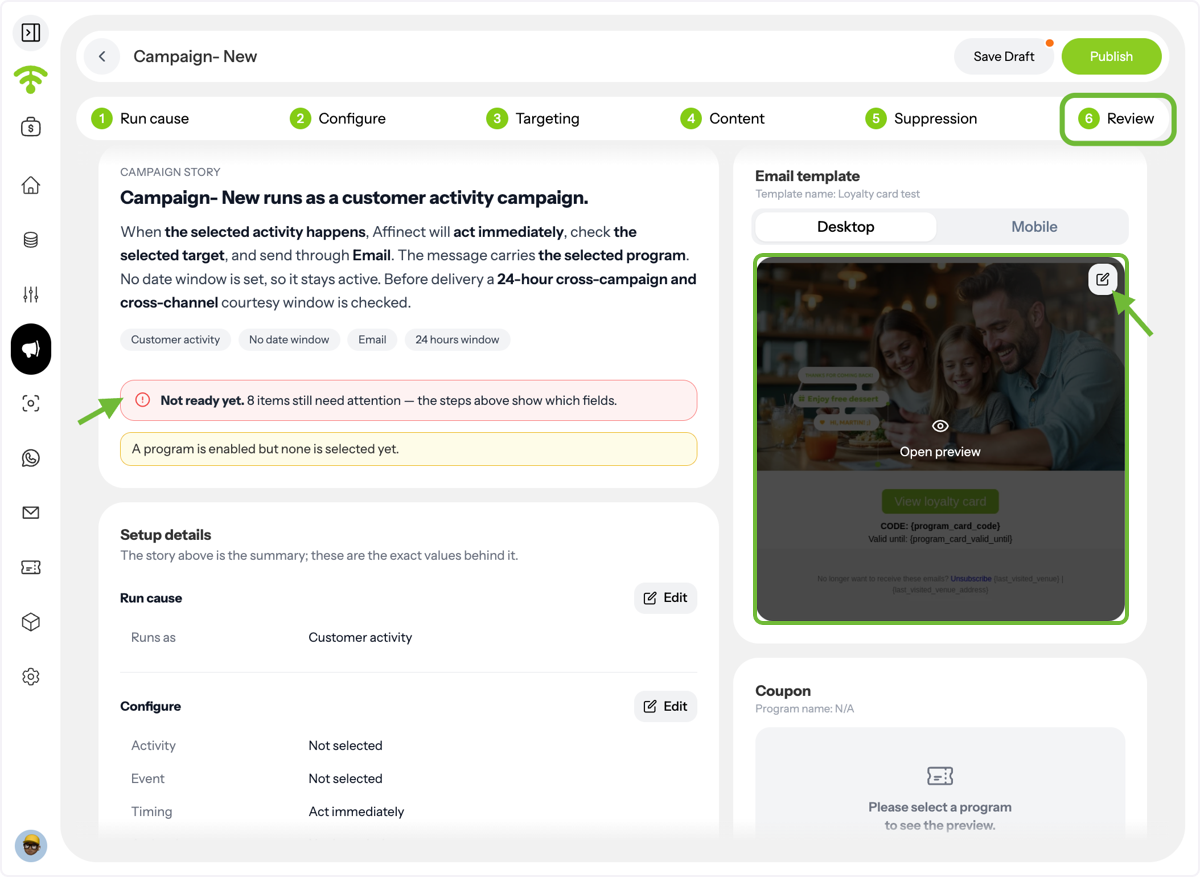
Move to Review to check your campaign before publishing.
You can:
- Preview your message
- Edit your content
- Review your campaign configuration
- Check your targeting
- Review your selected channel
- Identify any information that still needs to be completed
Make sure all required fields are completed before moving forward.
Send a Test & Publish
Before sending your campaign to your audience, scroll down and send yourself a test campaign.
Review the test to make sure everything looks and works as expected. Once you're happy with the campaign, click Publish.
And that's it; your campaign is ready to go!